Posts

Showing posts from July, 2014

Distracted: OH NO!

So San Diego Comic Con is going on. And a Tali cosplay appeared on my facebook feed. :) It was fun to see especially since it was a ME 3 version. I think I'm unique in doing ME 1 version. But I'm distracted. I haven't done costume stuff for a couple of days now. >_> I started playing Dragon Age Origins again. /sigh/ I keep glaring at the Warden Armors. WHY ARE THERE SO MANY BELTS?? GAwww. Anyway, I'm both distracted and inspired. Perhaps it's time to feed the muse instead of work out. But I'm sure the beads I ordered will be coming in soon. And I'll be moved to work on something.
Foot Fetish - err...making feet

Image
Last night I finished the Gloves for the Wolf Queen. (Pics to come soon). Once those were finished I began thinking about how I wanted to do the feet. In my drawings you can see they are kind of looking like high heels which is what the concept art for the character had. I tried on my high heels last night and began to think very seriously. As my feet started to ache after 30 seconds of wear it became clear that much like my Tali cosplay, the Wolf would not be able to long stand the high heel...unless I went with boots. While doing research on how Fursuits got around this issue, I stumbled upon sock paws. With a little re-engineering I think I can make my sleek, delicate Wolf Queen feet. Because she is regal after all. Some of my plots: 2 pairs of socks (ballet/anklet socks + nylons/thigh highs) Inserts Craft foam Tape: Duct, Masking and more Glue of the hot variety Similar to the route I went with Tali's feet I will use craft foam stuffed with scraps and wrapped...

Costume Plans: The Wolf Queen

Image
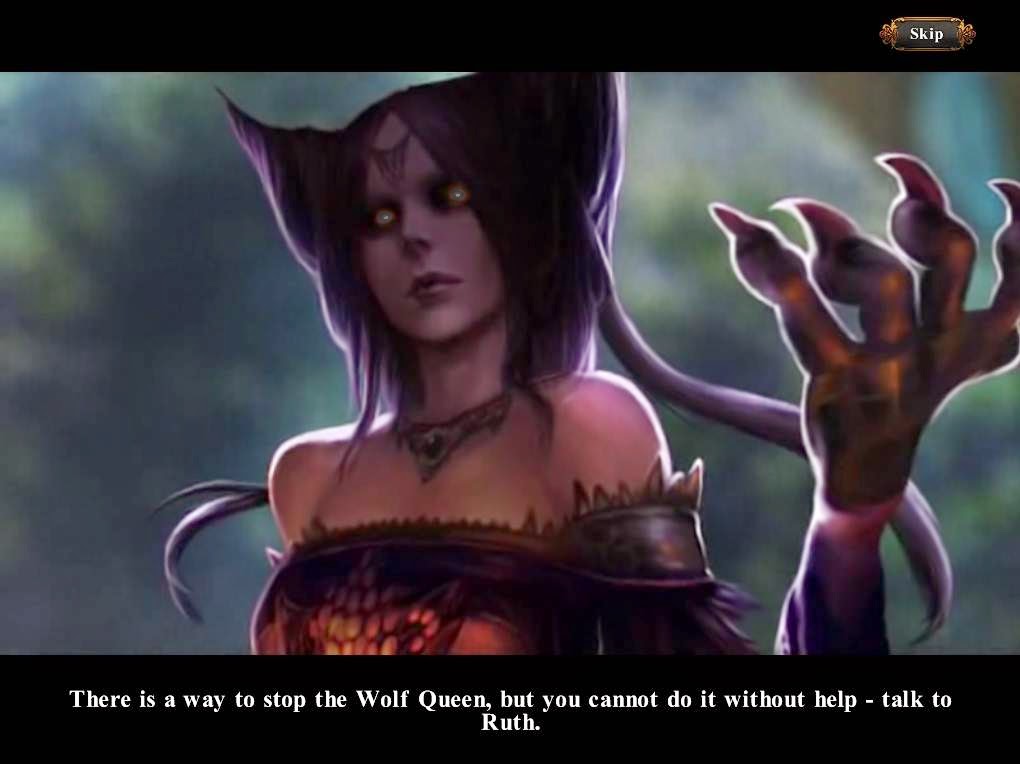
Blending Vampire queen seductress with werewolf. It was inspired by the design of the Wolf Queen from the casual game Dark Parables: Red Riding Hood Sisters . Quite pretty really. Even with those dead glowing eyes and claws. Here are some designs I've been playing with. In this design I have a couple of simplicity patterns I'll be working with. Corsets , Bustle Skirts , and an off the shoulder shirt . (And then while searching the site I stumble upon THIS pattern and think...dang that short skirt is what I was looking for...oh wells. All of the patterns I bought were on clearance for like $2 each.) Here's another rough sketch of what I plan to do using one of the shorter bustle skirts. Things always look so nice when drawn. LOL...I'll have to use my photoshop template when I get home. I also plan on possibly making some jewelry too. It's been fun looking at different beads and such. ^^ I'm so excited! (As I usually am when a costume in the plan...

Dye Plastic Dye!

Image
So I found this video on dyeing petg plastic visors. And guess what...it works like a charm!  I now have a purple visor!  It obscures my face, but I'll also be having back lighting in the helmet so I'll still be a bit visible...when I want to be. :D So studly. Currently working on the sleeves. I'll have to finish the armor before adding more. 

More Warden Progress: Jacket

Image
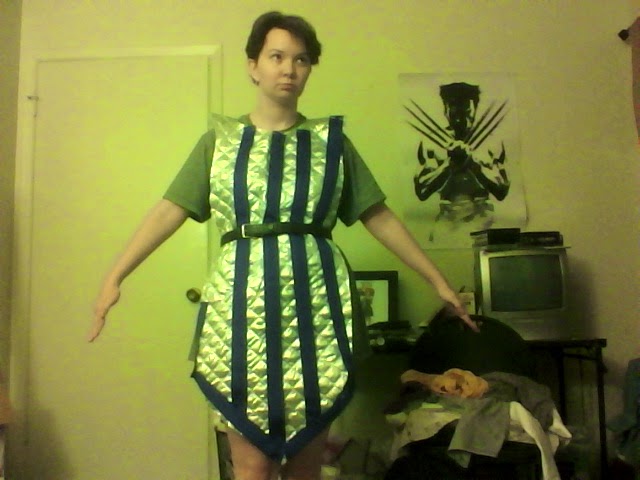
Things I learned.  1) Pintucking takes FOREVER. Well...it took 2 Seasons of Red Vs. Blue and Hot Fuzz.  2) Collars, I don't not think I know how to do them right. I made it up as I went.  3) I'm going to need a lot more sewing machine needles for my projects. :/ 4) Whenever you find the perfect color fabric, there's always not enough. And when you go back to the store, it's never restocked. That is the story of the blue ribbon. I didn't want to go with this bright shiny blue.  Things I need to do. 1) Stud it up. Probably only on the lower parts of the sleeves and the back because bulky armor covers most of it (aka pressing down points into my flesh). 2) Glue down the ribbon. 3) Before I glue I need to "dirt" things up. Got black spray paint and I'm thinking of pouring tea over it.  But yay Jacket and tabard and progress!!

Visualization: Rethinking King Alistair

Image
I've been reading up on techniques for crossplay (that is dressing up as a character that is the opposite gender as the player.) Now, luckily for me, most of the issues can be solved by armor. Yay. However, the armor does have to be tailored a bit differently that normal. So...I took some body shots of myself and colored over myself in photoshop. Here's the deal. Doable right? I mean I can widen my shoulders quite a bit thanks to the pauldrons and mantle. However, I'll still need shoulder pads to give the required lift. I intend to have my arms padded a bit too just so It doesn't look like stick arms coming off broad shoulders. Also cutting the curve of my legs down should be achieved with the boot covers and thigh bits.  It was my hips and waist that gave me real worry. Here's what my body looks like underneath this plan.  Mmmhmm...dem birthing hips. I'm a classic pear shape with a pinched waist if I stand up straight. My shoulders are also rou...

Warden Armor stuff

Image
It was at this point I ran out of ribbon to make the stripes...so I have to get more today. Right now it's only pinned on. I plan on hotgluing it down. I got some more ribbon So I should be able to finish the most of the tabard today. Also got the blue fabric for the shrug. It's a good day for costumes.

I...I think I did it!

Image
It's easy to see out of...those are just droplets of water. It was a bit dusty. Tinted  with ink and a thin layer of Tamiya After another layer of ink. Wearing a mask under the tint.  Here are all my attempts so far. The safety mask with too much tamiya, the failed vacuum forming, the successful vacuum forming with too much tamiya, and my current one.  Still wondering how to tint, till be able to see out of it but hide my face mostly. 

Epic 4th of July Costume Weekend

I am pleased to report that I actually got through most of my list for the weekend. Yaaaay. So happy to see progress. You can see results on my Deviant Art . My plastic DID come in on Saturday however, I was too involved in sewing that I put it off. I also managed to get a little work done on my Warden tabard. Found out I didn't have enough blue trim so I'll have to buy a couple more rolls of ribbon. Not terrible. Things I still need to do: Adjust the pants so they fasten close in the back...thinking velcro for this. Same with the bandeau. Again, using velcro. Cut vinyl to make the belts and armbands. Necklace bit. Helmet Armor bits Visor

Epic 4th of July Costume Plan

No idea if I'll get this done but here's what I think I'll be doing. R esurfacing the visor buck with a layer of regular plaster which I will sand.   Sew the Sleeve, Gloves, Pants and Bandeau Cut and sew the trim for the veil Put the blue stripes on my warden tabard.  Eat hotdogs because America! (failed...turns out they were moldy) Maybe go swimming at the pool a bit. (Mother Nature decided otherwise) Lock myself inside all weekend and watch movies! :D yay!   Mass on Sunday Finish some things I have to do on my job search (Ha ha ha...yeah...) If my plastic comes in this weekend. Then...we shall FINISH the visor. ONCE and for ALL. Hmm pretty ambitious really. We'll see how things really go. ;)

The Tragedy of Tali (More Visor Woes!)

Image
Ha ha ha ha aha...we were SOOOO CLOSE! So close but we tripped at the finish line! *SOB* So here's what happened. Today I got my sheet of PETG plastic and I thought "YAY" it's VISOR DAY. So I got the sheet into the window frames, clamped it down, got my vacuum set up with the buck and pre-heated the oven to broil at 350. First mistake, at first I used one oven mitt and a pot holder to put the plastic in the oven. I bumped my knuckle on the edge of my oven. So I looked for my other oven mitt after holding my knuckles under cold water for awhile. Well, I was not deterred. I heated up the plastic, letting the vacuum run, and quickly held it over the buck. And it was JUST like in the youtube videos. I just had to wait for it to cool. It took a little coaxing to get the buck out and cut the visor shape and here's what we got! AHHHHHHH it's a visor! But wait...something seemed a bit...weird... Well, I didn't really sand the plaster well and the gauze pa...