Posts

Showing posts with the label Dragon Age

Modesty's List of Table Top Role Playing Games

 These are games I have played or observed others playing to give context. (This post is a Work in progress, I will likely come back to correct things. Genre - borrowing from movie and book categories to give you a shorthand sense of what the tropes, characters, and stories are like. (i.e. Western, High Fantasy, Space Opera, etc) Setting - A bit more specific than genre, it will include specific things like time period, location, character types, and world premise.  Dice Type - a quick description of what kind of dice and how many might be needed for playing a game. Some systems may have special dice specific to that game while some may have alternatives.   Difficulty - this is from a brand new player perspective but this incorporates how complicated the rules can get as well as how in-depth the lore might be.  Easy - rules are intuitive and there's only low-level world building Average - you can skim rules and kind of learn as you go, the lore is based on tr...
Updates - Costumes and Crafts

Image
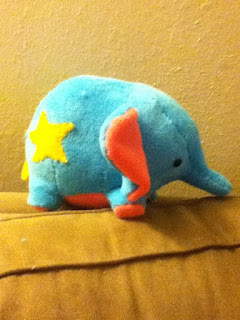
 So I've been taking on too many projects again which slows everything down. BUT some cool things that have been going on. Elven Inquisitor: I decided I wanted to play with Foss Shape just to see how it'll work. I might use that instead of the foam base for the stretch vinyl. I have also got in my order of Worbla Black to create some armor bits...someday. I just haven't been into it right now. PLUSHIES GALORE! So I have been sewing plushies quite a bit. I've gotten into sock animals. I made some for my friends with young kids. I've also finished my nephews musical baby elephant. :) My living room has two LARGE plastic bins just full of fabric. I still want to make some plush ponies and some plush dinosaurs but I've been distracted. Digital Stuff I've been writing a new visual novel. I don't know if I'll finish it but it does help pass the time at work. I've got tons of art that are sitting on back burners including art for a visu...

Check out my Bod...ice

Image
Boo-boo-be-doop. I have been thinking and rethinking the bodice armor for the Dalish Inquisitor. I may have finally...FINALLY arrived at A solution. Here's what I did. First, I got inspired by the bodice design for Anna's winter dress in Frozen. That design just looked very similar to the design of the armor itself.  (Focus on the neckline really.) So I learned a thing or two. First how to block out a bodice pattern. It's similar but not quite the same as the Frozen dress. My next debacle was figuring out which material to use.  or The vinyl has the right color but sooo wrinkly. :(  So I went with the foam.  SO MANY PINS! The foam was heated shaped and glued. I need to make some adjustments to the seams so like they're not there at all. Then I can cover it with the fabric. :D I also got my airbrush paints ready to go on this one. ^^ Can't wait to use it. But first...have to get the right fabric to cover this. 

Rethinking the Elf Bodice

Image
So here's how this happened. I'm at work on a slow Saturday night and decided to play around in my test store. (I do tech support and my test store is custom pony based!) I created a new line of items in my store "Fluffy Ponies" and created a product for a plush pony. Which got me into research on how to actually make them and what kind of fabric is used and so on.  So I was neck deep in research about how to make the eyes, the hair, and stumbled on someone's project for a life-size Rainbow Dash. They had a journal listing how they made it. It was amazing. One thing that caught my attention was how she made the Element of harmony... THIS tutorial And then I thought...my god...I've approached this all wrong. Well...not completely wrong...I just got the wrong kind of vinyl when I started. My current vinyl is felt back and very stiff (Which will be great for the hip leaves). But the bodice has a lot of curves...particularly in the breast region. This wou...

Faux Chainmail and Bodice Armor

news!  I've made some progress on my Dalish Inquistor. The bodice is in progress (pics soon)  So I had a round about way of figuring out how to do this. First, I thought that the vinyl I purchased would be thinner and a bit more flexible. So I went about creating the base of the bodice in craft foam and cover it in the vinyl. But that wasn't quite working out because the vinyl was too thick and stuff. So I took out the craft foam save for the bra cups. Which I placed too high up at first. Then I realize that I'd have to cut and sew the bodice...you know like an actual pattern of a bodice. ...now it fits and looks nice-ish. I'm just glad the belt is so thick. :P So I have some more detail to put on this as well as a way to lace it up in the back. Then I'll work with my new airbrush to get some battle damage!  (IMAGE) Then there's the chain mail which was going to be made out of a grey net mesh. I cut out pieces for a turtleneck shirt and leggings, pinne...

Why haven't I updated this!?

Image
Ha so it's been awhile since I posted progress. And progress had been made! First I'd like to show off my Grey Warden costume that I "debuted" at PAX South. Some of it broke off before I got this picture taken. :P Grey Warden...missing elbow armor. Tali's cosplay has been retired early as I rethink the design. The helmet is the only part that really came out nicely. Well...the metal arm stuff was pretty good too...and pants. Okay but my issue is that it had too many moving parts to put on by myself. I'm rethinking some of my take on the costume design. Like I probably will sew the bandeau onto the shirt directly and make the neck thingy out of fabric instead of foam. I still have plenty of leftover fabric so I can do it. And I'm still unemployed. :P Much sadness. I have the fabric for the Inquisitor but little motivation to work on it. Currently, I have some very serious things to think about for my life in terms of work. We'll see how things ...

Dalish Inquisitor costume

Image
Curse you inspiration. I'm not saying I'm actually going to MAKE this costume since I need to finish Tali and the Grey Warden costume first. But I am half-tempted to drop the Warden for this. Ugh but so much of it is done. Must finish. So here's the plan. Costume Analysis There are 4 layers: Chainmaille, Green Armor, Limb Armor, Clothe bits Chainmail looks like a bit body suit. but most likely shirt and chaps. There are seams that are visible on the chain itself. For the feet, it looks like clothe sandals. Same with fingerless gloves. Green Armor: A bodice and Tassets. They look like they're a firm leather with some raised designs. Because it's a game, the bodice is all one piece with no discernible method of keeping it on. although I guess you could tie it in the back. The tassets look simple enough and attach to a mystery belt under the bodice. Limb Armor: These (on my screen shots) are coppery/Bronze in color. The Arms have pauldrons mixed of leath...

You can LIIIIIIVE!

Image
Sorry about that, I turned 30 about a week ago and many things changed at once, including projects I'm working on. With Thanksgiving coming up, I'll have 4 free days to work on stuff. My plan is to set up my sewing machine and finish up the sewing needs for Tali's Costume. I've been negligent on that part. I will also remake the helmet to suit the new visor eventually, but first the sewing. The other project I've been working on and off is an RPG Maker game, currently unnamed. I made a wiki for it: http://centaurrpg.wikia.com/wiki/Centaur_Game_Wiki Along with that Dragon Age Inquisition came out...and I had to buy a new computer to run it basically. :P She's custom built. But now I have spare parts and computers to get rid of. I still haven't played the game yet...but I AM ready to. I'll post about the game on my Gamer blog.

Distracted: OH NO!

So San Diego Comic Con is going on. And a Tali cosplay appeared on my facebook feed. :) It was fun to see especially since it was a ME 3 version. I think I'm unique in doing ME 1 version. But I'm distracted. I haven't done costume stuff for a couple of days now. >_> I started playing Dragon Age Origins again. /sigh/ I keep glaring at the Warden Armors. WHY ARE THERE SO MANY BELTS?? GAwww. Anyway, I'm both distracted and inspired. Perhaps it's time to feed the muse instead of work out. But I'm sure the beads I ordered will be coming in soon. And I'll be moved to work on something.

Dye Plastic Dye!

Image
So I found this video on dyeing petg plastic visors. And guess what...it works like a charm!  I now have a purple visor!  It obscures my face, but I'll also be having back lighting in the helmet so I'll still be a bit visible...when I want to be. :D So studly. Currently working on the sleeves. I'll have to finish the armor before adding more. 

More Warden Progress: Jacket

Image
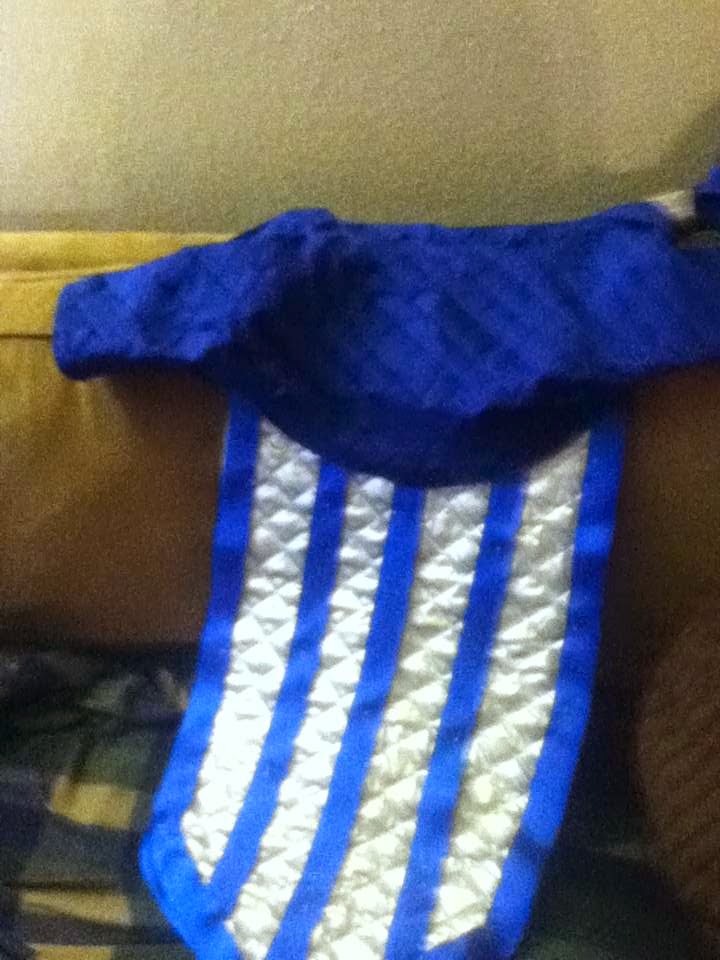
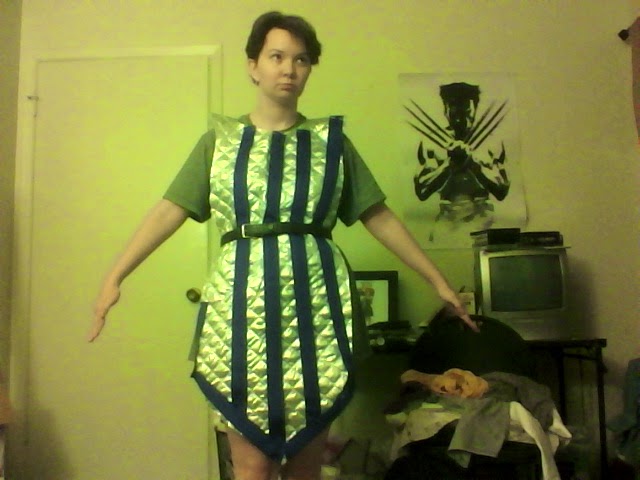
Things I learned.  1) Pintucking takes FOREVER. Well...it took 2 Seasons of Red Vs. Blue and Hot Fuzz.  2) Collars, I don't not think I know how to do them right. I made it up as I went.  3) I'm going to need a lot more sewing machine needles for my projects. :/ 4) Whenever you find the perfect color fabric, there's always not enough. And when you go back to the store, it's never restocked. That is the story of the blue ribbon. I didn't want to go with this bright shiny blue.  Things I need to do. 1) Stud it up. Probably only on the lower parts of the sleeves and the back because bulky armor covers most of it (aka pressing down points into my flesh). 2) Glue down the ribbon. 3) Before I glue I need to "dirt" things up. Got black spray paint and I'm thinking of pouring tea over it.  But yay Jacket and tabard and progress!!

Visualization: Rethinking King Alistair

Image
I've been reading up on techniques for crossplay (that is dressing up as a character that is the opposite gender as the player.) Now, luckily for me, most of the issues can be solved by armor. Yay. However, the armor does have to be tailored a bit differently that normal. So...I took some body shots of myself and colored over myself in photoshop. Here's the deal. Doable right? I mean I can widen my shoulders quite a bit thanks to the pauldrons and mantle. However, I'll still need shoulder pads to give the required lift. I intend to have my arms padded a bit too just so It doesn't look like stick arms coming off broad shoulders. Also cutting the curve of my legs down should be achieved with the boot covers and thigh bits.  It was my hips and waist that gave me real worry. Here's what my body looks like underneath this plan.  Mmmhmm...dem birthing hips. I'm a classic pear shape with a pinched waist if I stand up straight. My shoulders are also rou...

Warden Armor stuff

Image
It was at this point I ran out of ribbon to make the stripes...so I have to get more today. Right now it's only pinned on. I plan on hotgluing it down. I got some more ribbon So I should be able to finish the most of the tabard today. Also got the blue fabric for the shrug. It's a good day for costumes.

Epic 4th of July Costume Plan

No idea if I'll get this done but here's what I think I'll be doing. R esurfacing the visor buck with a layer of regular plaster which I will sand.   Sew the Sleeve, Gloves, Pants and Bandeau Cut and sew the trim for the veil Put the blue stripes on my warden tabard.  Eat hotdogs because America! (failed...turns out they were moldy) Maybe go swimming at the pool a bit. (Mother Nature decided otherwise) Lock myself inside all weekend and watch movies! :D yay!   Mass on Sunday Finish some things I have to do on my job search (Ha ha ha...yeah...) If my plastic comes in this weekend. Then...we shall FINISH the visor. ONCE and for ALL. Hmm pretty ambitious really. We'll see how things really go. ;)

Progress! Yes!

Image
The Rainbow Warden!!! So after many weeks of no progress I had a BURST of creative energy today and finished cutting out ALL pieces and gluing some pieces. Still need to modify the shoulders, collar, and hips. As you can see it's not holding together. Soooo it's still a work in progress.  ALSO super sad, my video camera isn't working like it should anymore. :/ I don't know what happened to it. It turns on, it has fresh batteries, the memory card is fine, but it won't respond to button presses after I turn it on. ...perhaps this is what I get for opting for a $20 camera. XD ALSO... Data corruption detected.  I've made a budgeted Omni-tool...still working out the kinks in the design. Not sure how I'm really going to attach all the pieces and keep it together. I have some ideas. Hot glue will obviously work in some areas, maybe clear wire of some kind? I don't know. Also a weird minor update for the make-up I plan to do for my Tali c...

Slow Progress, Grump Attitude, New Tricks

My progress on the armor project has been uncomfortably slow. I knew it would take several months because of my schedule issues and other life priorites (like finding a new job). However, like most creative types I know leaving the project untouched can have disasterous consequences. One of which is getting bored and abandoning the project...which to be honest I've come close to. Luckily the monetary investment I've put in motivates me. I've also broken one of my "rules" when costume making. That would be to look at other's attempts at the same costume, comparing my efforts and getting discouraged. Many creative types can easily feel inadequate when looking at a professionally executed cosplay. On the one hand, you can learn some neat tricks but on the other hand, you know that at your level, the product you work on won't be as awesome. In my case I know there are MANY factors that I can't help that prevent me from achieving the high level stuff. ...

Warden Armor Mini-Update 3/25

Okay, quick update. I've gotten to the point where I have sealed and painted some armor pieces. The shoulder pieces are almost done. I just have one more section I have to figure out. But the pauldrons and spaulders are in a good place. The chest pieces is pretty much done. I still have to add the strapping and connections for the straps but I'm in no hurry. So my camera ate the pictues and video I took. :P I'll have post how the painting went.

Warden Armor Progress Report: 3/10/14

Image
I've been working on and off with armor pieces for the past few weeks. Mostly cutting out the foam pieces and making plans. Here's the progress of various pieces. Chest: (see video) Cut out of foam. Ready for sealing Helmet: Experimenting. As you can see I'm making it up as I go. But I think I'm getting closer. My Hair dryer does make a decent heat gun for thin foam...although...it's still hard to make it hold that shape. :P Collar: Needs to be cut Spaulders:  These just need sealing and paint before being put onto fabric. Shoulders: (pic) This is giving me the most trouble right now. Trying to form the correct shape out of foam is surpisingly difficult. Here are some of my failed experiments. Thicker Foam Frame: It didn't make the shape right. (pic) Cardboard frame: CLOSE but not quite. (pic) Thin foam guide shape: I'm getting somewhere! (pic) FINAL THOUGHTS. The big issue is Buckling. What I have to do is make trianglar cuts in...

Interesting (not distraction) research and progress

I've been conducting research on various ways to give foam a hardened finish. Originally, I was going to go with Styrospray, but it's $30 a pop and I'm thinking there's got to be an easier/cheaper way. Here's some things I found as suggestions. Bedliner - for trucks. Durhams Water Putty* Wood glue Foam Coating I managed to find the water putty at Home Depot today for like $2. Compared to the 30 dollar option it seems awesome. But this is also based on my "needs" for the costume. It doesn't need to be "battle ready" and I don't intend to play act in it. Just pose. ;) Also, I've never used the stuff before so it's a cheaper experiment really. I've also sort of started experimenting of the chest piece for Alistair. ...It is trickier than I first anticipated. Also you'd think using a box cutter to cut boxes would be...I don't know...less of a hassle? Ah wells. I still intend to cut the heck out of the boxes that ...

Alistair Armor: Day 1

Image
Progress report. I've finished the paper patterns for the armor pieces of Alistair's armor. Arm Bracer Elbow Piece Chest and back (may need some altering. Should be wider at top.) Everything else: Boot, knee, thigh, shoulder For this pattern it's important to measure out the "strips" that make up the armor pieces as well as the shape. For this style of armor both elements are important. All pieces will have a "base" which takes the shape of the piece. All pieces will also have what look like strips. There are a few ways I could approach this. The method I decided on was to make a thin base in the shape of the armor piece and then cut the strips and lay them over the base. Each strip will be covered in vinyl pleather.