Posts

Showing posts with the label Warden

Why haven't I updated this!?

Image
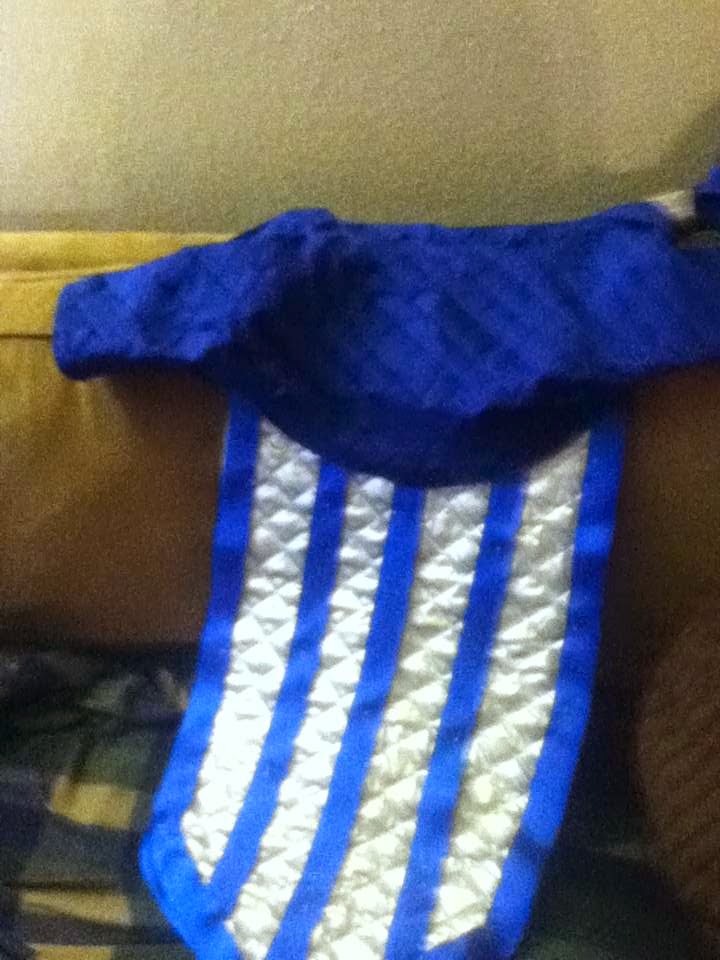
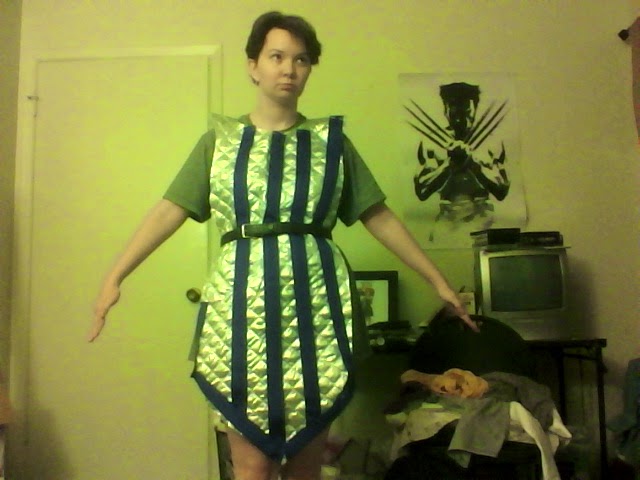
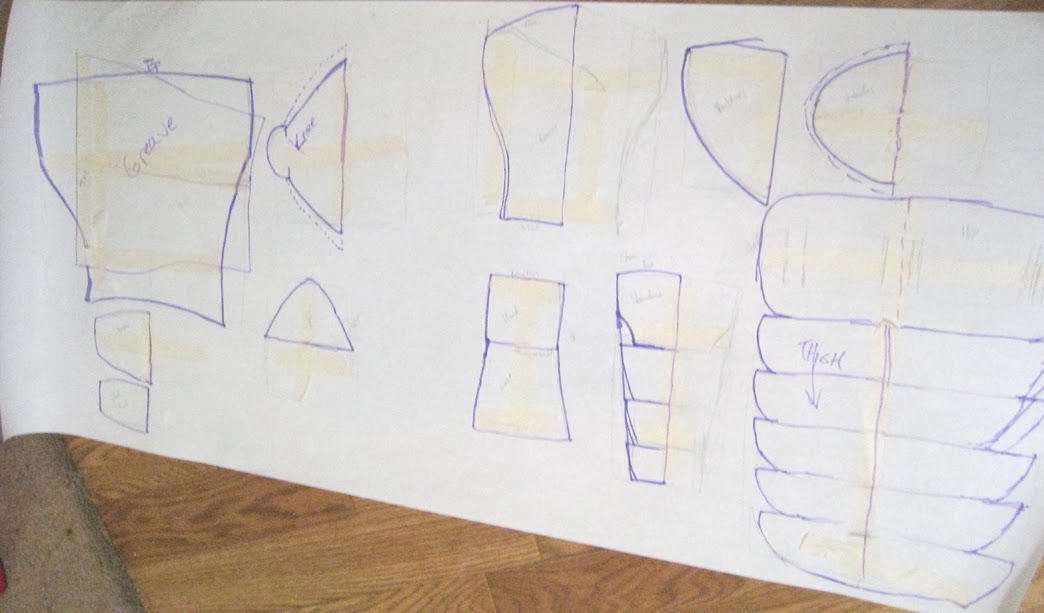
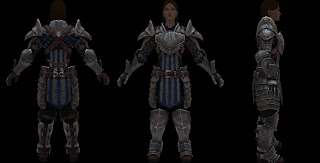
Ha so it's been awhile since I posted progress. And progress had been made! First I'd like to show off my Grey Warden costume that I "debuted" at PAX South. Some of it broke off before I got this picture taken. :P Grey Warden...missing elbow armor. Tali's cosplay has been retired early as I rethink the design. The helmet is the only part that really came out nicely. Well...the metal arm stuff was pretty good too...and pants. Okay but my issue is that it had too many moving parts to put on by myself. I'm rethinking some of my take on the costume design. Like I probably will sew the bandeau onto the shirt directly and make the neck thingy out of fabric instead of foam. I still have plenty of leftover fabric so I can do it. And I'm still unemployed. :P Much sadness. I have the fabric for the Inquisitor but little motivation to work on it. Currently, I have some very serious things to think about for my life in terms of work. We'll see how things ...

Inspiration coming back!

I swear shopping for costume supplies does this for me, but I found a new thing. Yesterday I was lamenting on how my styrene armor for Tali wasn't shaped right and was just too stiff. I couldn't walk well in the leg armor and the metal arm barely fits. Then I remembered seeing something about Wonderflex so I went and did some research. For rounded armor pieces, it would be better. But then I discovered Worbla. My mind was blown. Putty plastic? Glue on one side? So I ordered some. :) I can still use the styrene cutouts as a base I think. It's also got me re-evaluating my Warden armor. I have most of the foam bits cut out. The Worbla would be so good to use on it. So excited. Seriously. I've also got a new strategy on the leg armor. I'll share it after I do some doodles of it. Update: OMG OMG OMG...there's a place that sells Worbla IN AUSTIN...close-ish to where I live!!! The downside...I was literally just at that store TODAY and didn't know until...

Dye Plastic Dye!

Image
So I found this video on dyeing petg plastic visors. And guess what...it works like a charm!  I now have a purple visor!  It obscures my face, but I'll also be having back lighting in the helmet so I'll still be a bit visible...when I want to be. :D So studly. Currently working on the sleeves. I'll have to finish the armor before adding more. 

More Warden Progress: Jacket

Image
Things I learned.  1) Pintucking takes FOREVER. Well...it took 2 Seasons of Red Vs. Blue and Hot Fuzz.  2) Collars, I don't not think I know how to do them right. I made it up as I went.  3) I'm going to need a lot more sewing machine needles for my projects. :/ 4) Whenever you find the perfect color fabric, there's always not enough. And when you go back to the store, it's never restocked. That is the story of the blue ribbon. I didn't want to go with this bright shiny blue.  Things I need to do. 1) Stud it up. Probably only on the lower parts of the sleeves and the back because bulky armor covers most of it (aka pressing down points into my flesh). 2) Glue down the ribbon. 3) Before I glue I need to "dirt" things up. Got black spray paint and I'm thinking of pouring tea over it.  But yay Jacket and tabard and progress!!

Visualization: Rethinking King Alistair

Image
I've been reading up on techniques for crossplay (that is dressing up as a character that is the opposite gender as the player.) Now, luckily for me, most of the issues can be solved by armor. Yay. However, the armor does have to be tailored a bit differently that normal. So...I took some body shots of myself and colored over myself in photoshop. Here's the deal. Doable right? I mean I can widen my shoulders quite a bit thanks to the pauldrons and mantle. However, I'll still need shoulder pads to give the required lift. I intend to have my arms padded a bit too just so It doesn't look like stick arms coming off broad shoulders. Also cutting the curve of my legs down should be achieved with the boot covers and thigh bits.  It was my hips and waist that gave me real worry. Here's what my body looks like underneath this plan.  Mmmhmm...dem birthing hips. I'm a classic pear shape with a pinched waist if I stand up straight. My shoulders are also rou...

Warden Armor stuff

Image
It was at this point I ran out of ribbon to make the stripes...so I have to get more today. Right now it's only pinned on. I plan on hotgluing it down. I got some more ribbon So I should be able to finish the most of the tabard today. Also got the blue fabric for the shrug. It's a good day for costumes.

Epic 4th of July Costume Weekend

I am pleased to report that I actually got through most of my list for the weekend. Yaaaay. So happy to see progress. You can see results on my Deviant Art . My plastic DID come in on Saturday however, I was too involved in sewing that I put it off. I also managed to get a little work done on my Warden tabard. Found out I didn't have enough blue trim so I'll have to buy a couple more rolls of ribbon. Not terrible. Things I still need to do: Adjust the pants so they fasten close in the back...thinking velcro for this. Same with the bandeau. Again, using velcro. Cut vinyl to make the belts and armbands. Necklace bit. Helmet Armor bits Visor

Epic 4th of July Costume Plan

No idea if I'll get this done but here's what I think I'll be doing. R esurfacing the visor buck with a layer of regular plaster which I will sand.   Sew the Sleeve, Gloves, Pants and Bandeau Cut and sew the trim for the veil Put the blue stripes on my warden tabard.  Eat hotdogs because America! (failed...turns out they were moldy) Maybe go swimming at the pool a bit. (Mother Nature decided otherwise) Lock myself inside all weekend and watch movies! :D yay!   Mass on Sunday Finish some things I have to do on my job search (Ha ha ha...yeah...) If my plastic comes in this weekend. Then...we shall FINISH the visor. ONCE and for ALL. Hmm pretty ambitious really. We'll see how things really go. ;)

Progress by inches

So I did do some smaller bits for my costumes although they're not done yet.  Tali: Gloves: Pattern cut and pinned Sleeve: Pattern cut and pinned Pants: Pattern cut and sorta pinned Bandeau: Pattern cut I attempted to do a test of my vacuum forming set up. Sadly, Somethings didn't quite work right. The vacuum works fine, but I didn't secure my plastic right. So my practice plastic curled up instead of sag down. So today I'm out to get another window frame. I also ordered another sheet of PETG plastic just in case I screw up. Today may be the big day I try to finally vacuum form the visor. Warden: Tabard: Pattern cut :) Yes. I finally, FINALLY did something with this project. The next step would be to finally finish off the foam bases for the armor pieces. Just need to cut out the shoulder bits.

Progress! Yes!

Image
The Rainbow Warden!!! So after many weeks of no progress I had a BURST of creative energy today and finished cutting out ALL pieces and gluing some pieces. Still need to modify the shoulders, collar, and hips. As you can see it's not holding together. Soooo it's still a work in progress.  ALSO super sad, my video camera isn't working like it should anymore. :/ I don't know what happened to it. It turns on, it has fresh batteries, the memory card is fine, but it won't respond to button presses after I turn it on. ...perhaps this is what I get for opting for a $20 camera. XD ALSO... Data corruption detected.  I've made a budgeted Omni-tool...still working out the kinks in the design. Not sure how I'm really going to attach all the pieces and keep it together. I have some ideas. Hot glue will obviously work in some areas, maybe clear wire of some kind? I don't know. Also a weird minor update for the make-up I plan to do for my Tali c...

Warden Armor Mini-Update 3/25

Okay, quick update. I've gotten to the point where I have sealed and painted some armor pieces. The shoulder pieces are almost done. I just have one more section I have to figure out. But the pauldrons and spaulders are in a good place. The chest pieces is pretty much done. I still have to add the strapping and connections for the straps but I'm in no hurry. So my camera ate the pictues and video I took. :P I'll have post how the painting went.

Warden Armor Progress Report: 3/10/14

Image
I've been working on and off with armor pieces for the past few weeks. Mostly cutting out the foam pieces and making plans. Here's the progress of various pieces. Chest: (see video) Cut out of foam. Ready for sealing Helmet: Experimenting. As you can see I'm making it up as I go. But I think I'm getting closer. My Hair dryer does make a decent heat gun for thin foam...although...it's still hard to make it hold that shape. :P Collar: Needs to be cut Spaulders:  These just need sealing and paint before being put onto fabric. Shoulders: (pic) This is giving me the most trouble right now. Trying to form the correct shape out of foam is surpisingly difficult. Here are some of my failed experiments. Thicker Foam Frame: It didn't make the shape right. (pic) Cardboard frame: CLOSE but not quite. (pic) Thin foam guide shape: I'm getting somewhere! (pic) FINAL THOUGHTS. The big issue is Buckling. What I have to do is make trianglar cuts in...

Interesting (not distraction) research and progress

I've been conducting research on various ways to give foam a hardened finish. Originally, I was going to go with Styrospray, but it's $30 a pop and I'm thinking there's got to be an easier/cheaper way. Here's some things I found as suggestions. Bedliner - for trucks. Durhams Water Putty* Wood glue Foam Coating I managed to find the water putty at Home Depot today for like $2. Compared to the 30 dollar option it seems awesome. But this is also based on my "needs" for the costume. It doesn't need to be "battle ready" and I don't intend to play act in it. Just pose. ;) Also, I've never used the stuff before so it's a cheaper experiment really. I've also sort of started experimenting of the chest piece for Alistair. ...It is trickier than I first anticipated. Also you'd think using a box cutter to cut boxes would be...I don't know...less of a hassle? Ah wells. I still intend to cut the heck out of the boxes that ...

DA2 Warden Day 1: Patterns

Image
So it begins. I have finally gathered enough supplies to get things started. I will post a vlog about things once I get my camera (which should be any day now). But the armor piece patterns have (mostly) been made. The helmet is giving me some difficulty. Here is an image of most of my pattern pieces. (I forgot the collar and breast plate. But I shall post them soon! Here's how I went about making the patterns. 1. Measurements. For me I used a rather estimated method of measuring for the various pieces. First, I opened up my reference images and found the piece I wanted to measure, for example the breastplate. Using masking tape, I taped over my clothes the width and height of the armor piece based on the image and relative to my body. Alternatively, I could have used measuring tape and wrote these things down, but there's a reason I wanted to try the tape. 2. I peel off the tape in one piece and lay it down on my pattern paper. Alternatively I could have used ...

Plan Update: DA2 Grey Warden Warrior

Image
Grey Warden Warrior Armor I've been doing a lot more research on materials lately for my grey warden armor and have been starting on pattern making for various parts. I'm going to list what I will be using as materials. Please note that these materials are attempting to also be a budgeted version of the armor. Seriously, I just saw someone else's cosplay and they made the scale-maille tabard. (Seeing that makes me want to give up because mine is INFERIOR!) Anyway, intimidation aside...they did say that the costume took 2 months and cost over $1000. -____- I do NOT have those funds on hand nor will I in the near future. I also have a lot less time in the day to work on such a project so it'll take more than two months I think. BUT, the person is a nice resource. This is my "shopping" list currently. It is subject to change. Also I'm not necessarily purchasing the item I'm linking to, it could be just an example. I try to find things local...

The Next Project: DA2 Warden Armor

Image
Been awhile since the last post, but since finishing the Halo Armor, I hit some rough patches of finances which hinders new projects. I've been trying to land a better job and haven't had much luck lately. I have long-term temp work which has been paying the bills, but only paying the bills. :P In good news my mother is helping me buy a new sewing machine. One that will be my very own. :) But for now at least I can go into the planning/collecting portion of the new costume project: Grey Warden Armor. Reference: Parts:  Tabard Blue Fabric: Cotton fabric or Fleece White/Silver fabric: Sheen fabric like satin or something with a sequin pattern. Other ideas: the silver part is actually scale mail I could imitate that pattern of scale mail or thin aluminum flashing. It all depends if I want to put the effort and money into making the tabard scale mail. UPDATE: Omg...This silver fabric for the win: Link  Shoulder Shrug: Blue - Blue Pillowed Fabric. There's a...