Posts

Showing posts from June, 2013

Halo Day 14

Image
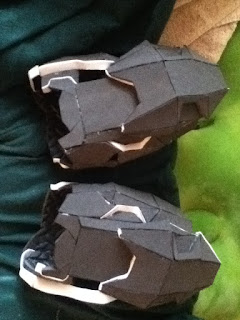
The shoulders are done. I got some more 5mm foam for detail work. Everything is coming together! Now I just need to finish the forearms, shins and boots. :) With the pace I'm going that might be withing the next three weeks. :D I will be going back to do detail work on other pieces and of course put visors on things. Then it's time to seal and paint.

Halo Day 13

Image
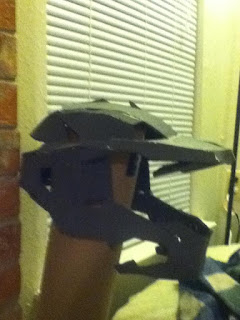
Finally got the last bits of detail on the helmet. Looks pretty good in these pictures. I definitely see some warping on the actual helmet but I've learned/saw some neat tricks people have done with halo armor and foam so I'm hoping that will help a lot with making it look less like a glue pile. Next up are the shoulders.

Halo Armor Day 12

Image
Now I'm working on arguably the most difficult piece of the costume, the helmet.  Not only does it have to fit, but it has to look proportional. Following the pep file this is what I got. As you can see, it look like a small dinosaur is trying to eat my head. Which means, danger, TOO BIG. :P  Instead of scrapping everything to start over, I decided to see if I could still salvage this build. Making something a little smaller is not that tough. ;)   A few hours later This is my result. I shorted the top brim and the jawline a little bit. The helmet IS meant to be a little roomy so I can pull my head through and put in some cushioning. As you can see, I don't yet have my visor so for now I have to hold off on adjusting this too much.  There are still pieces that need to be added like the mouth piece, the back of the neck and finishing up the jaw line. (It's not suppose to hang off like that really. ;) I'll finish those t

Halo Armor Day 11

Image
I finished the Thigh pieces. :D Mirroring the file confused me at first and I did end up almost making 2 left thighs. :B And here's how I extended the pattern. it'll all be painted so no worries.  I found some real good examples of halo in foam so I have a better idea on how to move forward with many of my pieces. 

Halo Armor Day 10

Image
Last night I put together one of the thigh pieces and ran into my first problem. The thigh piece while the perfect height did NOT fit around my thigh which is in my physique quite supple. ;) Front of Left Thigh Inside of left thigh. For now I've added some extra craft foam "buffer". But I'll have some things to consider before starting on the Right Thigh piece.

Halo Armor Day 8-9

Image
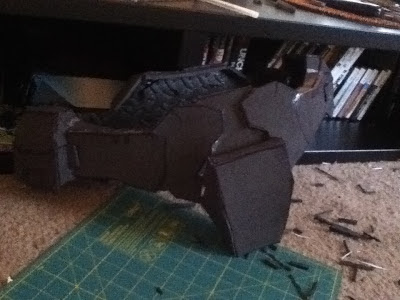
Front Back. So the chest piece is in a finished state. There's still a lot of "clean up" needed but that'll be before I prime for painting. Next I think I'll do the legs.

Gally Progress

Image
So here's some images of the costume. I've decided to redo the arms because these just look grey and dim. Sorry for the bad lighting! Also, this cat suit is NOT easy to move around in. I think I need to make some adjustments so it doesn't choke the ever loving life out of me.

Halo Armor Day 6-7

Image
Progress is good on the armor. Over the weekend I finished the belt (save for adding velcro to keep it closed). I've also made a good deal of progress on the chest piece.  Still learning how to do this. There's more gaps than I'd like in the chest piece

Halo Armor Day 5

Image
I managed to pull myself away from 3D modeling and texturing for awhile to get some work done on the halo armor. I'm currently cutting out the foam patterns and gluing them together. Already, I've burnt myself a couple times. Hot glue is really hot...who knew? Anyboo...I managed to get the hand plates and most of the belt glued together. I'm learning as I go unfortunately so the seams aren't pretty and neither are the edges. :/ Luckily I found my sharp scissors this morning so maybe going forward the edges will be slightly cleaner. :3 Butt piece, codpiece, side bits and those tiny things are for my hands. So the foam is thicker than I thought so luckily a lot of the teeny-tiny pieces of the pattern won't fit so I don't have to hurt myself doing that. I think I'm going to be lining my armor pieces with a thinner foam for better fit and filling in gaps as they come...because heck, I'm REALLY not good at cutting clean edges with the tools I have

Costume progress and DISTRACTIONS!!!

Gally Costume The boots came in the other day and they fit! BUT, they don't quite come up to my knee like I'd hope they would. However, they're awesome boots that double as high calf boots and ankle boots. Convertible boots man!  I plan on putting on the whole costume this weekend and hopefully getting a few pictures.  Halo Armor I think my cutting hand has recovered. Now for...you guessed it, MORE CUTTING. This time into the foam we go.  I think I'm going to start with a small piece, the hand plates before trying something larger. I need to figure out angled cuts and so on.  Note to self: Download Pepakura VIEWER onto the laptop and transfer the scaled versions for reference.  (Currently I only have the program on my desktop.)  Distraction! So I got a little sidetracked while resting my hand to play with the Dragon Age Toolset. It started a love-hate relationship all over again. I spent the past 2 days trying to reskin models, edit models and then

Halo Armor Day 2- 4

Day 2: Scaled the armor and printed everything out. ...I have a lot of work ahead of me! However, I now have ALL the supplies including the EVA foam. Day 3: The cutting of the patterns begins! Day 4: It's taken 2 days to cut the paper patterns out. I'll have to take a break before cutting foam, so as not to hurt my hand badly. I think I'll start with the belt.

Gally Day 1 and 2

Image
Day 1:  Gally Costume Knee Pads. I cut out the shape of the knee pads and glued velcro straps. Day 2: Painting Today I went outside to paint the pads silver. Using Fabric markers, I added the details to the knee pads AND the turtleneck. I found some gloves at the Party Supply store that look like robot hands (Transformers!) So that worked out pretty good. Some lessons learned: Fabric markers aren't really all that great and they love to LEAK and linger..