Posts

Showing posts from 2019

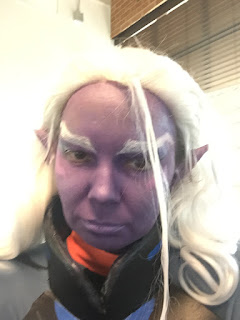
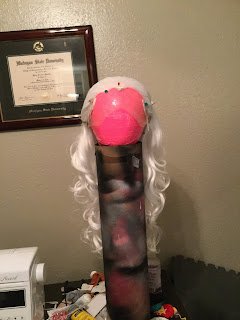
Next Costume Project: Lotara

Image
So I've settled on my D&D character Lotara for my next costume venture. She's a drow warlock. This will not be her final clothing design, but this was the source. Since I'm taking classes in leather-working, I'm going to put my new skills to use in this project. Also my cat will be roped into things with his own armor. Also, since I'm taking this course not only to learn a new skill but to possibly offer commission work in leather. I will only offer simple things at first. Might open an Etsy store finally. We'll see though.

Lotor Supply Cost (Scratch vs My Actual)

Scratch: If I did not already have any supplies on hand. (Also excluding tools such as a dremel, drill, paint brushes, scissors, sewing machine, Hot glue gun, heat gun, respirator and such.) Actual: With the things I had to repurchase due to fuck ups and excluding supplies I had on hand from previous cosplay. Scratch list Skintone, Ears, Hair Mehron Paradise Purple/TAG Lilac Primer Setting Powder Barrier Spray Eye Shadow (dark purple, white, lilac, pink) Wedge Sponges Blender sponge White eyeliner Black eye liner.  Clear gluestick  Latex Elf Ears Spirit gum Liquid Latex Lace front wig Long weft Fabric glue Spiking gel Hair spray Silicon Lubricant spray Barber Scissors Felt Armature wire Flat Elastic (white) (~$245) Clothing Portion Denim colored spandex 2 yd Black spandex 3 yd Burnt Orange spandex 1.5 yd Orange spandex .5 yd  Grey charcoal leggings x2 Interfacing .5 yard Clear elastic Snaps Thread Leotard Pattern Shoe Pattern Skirt Patte

Lotor Lessons - What I'd do differently

If I knew then what I know now, here's how I'd do this project differently. 1) 4 mm and 10 mm EVA foam for all armor pieces. I don't have an electric sander or the elbow grease to remove the patterning from floormats. 2) Don't use Worbla on full cylinders. If you want a slide-on piece, eva foam is the way to go. 3) Use sandpaper, not the dremel first. 4) Find the right bit on the dremel to drill holes. There is one. The Drill was too much. 5) Make the buck out of polymer clay. Also the thinner EVA is easier to heat treat. 6) Don't serge on one of the most expensive parts of the costume. At least Baste first. 7) Paneling is really the best way to handle the whole top leotard. Black from neck to leg line. Grey from neck to crotch. You could wrap craft foam in the same color spandex and glue them to the chest armor for ears. Alternatively Use small triangles with heat and bond. Orange spandex for the sleeve isn't a bad idea either. It just needs caref

Prince Lotor - Pre Convention Tweaks

Image
Mood: JUDGING YOU WITH GREAT PREJUDICE! A couple things learned from wearing the costume for a longer period of time and moving around in it: 1) The soft shoes that I severely injured myself making didn't work. The shoe armor was too thick and they were nearly impossible to walk in. 2) The front belt buckle needed a bit of support to lie flat against the seam of the leggings. 3) I need to reinforce the wig style with some thread or something. It's too thick for only glue to work. 4) The straps needed some tape to reinforce the glue. So here's what I did to address these issues. 1) I redid the shoes. I had sewn some "stirrups" for the leggings but it turns out the leggings were long enough to partially cover my feet already. I was able to pull these stirrups over some old shoes that were falling apart. They became handy boot covers! From there I took black craft foam and measured around the shoe to make the pointed toe armor and trim. I painted it

Prince Lotor - Halloween build

Image
Today I got to wear the Prince Lotor costume at work for Halloween. Learned a few things about wearing it in the process. This will let me make a couple of tweaks before the convention. So a couple straps need securing. (One I knew was loose and didn't fix. One broke off this morning.) The shoes really aren't working that great, I have a pair of loafers I might make a boot cover for out of spandex. Because I have SO MUCH LEFTOVER BLACK SPANDEX!!! Just need to practice posing a bit. These are pretty good. The LEDs on the gauntlets don't show up well here. Wig is on point, but I need to remember to flip my hair behind my ears and shoulders for best effect. Also need some belt taming.  All in all...BIG SUCCESS. I'll be ready for the con in a couple weeks. It takes 2 hours to put on the costume with 1.5 hours to put on makeup. Not too shabby.  Con plans: Go in the morning wearing Lotor hoodie, check in, sign-up for the contest, (if weapon done get weapon c

Prince Lotor - Day 20 + 21 + 22

Image
This has mostly been about little tweaks here and there on the costume. Fixing loose straps and such. Most of this past weekend was prop work. The cat Kova is finished: Doesn't look quite like how I imagined, but he is recognizable. :) He's serving as a decoration on my spooky desk. The sword is coming along nicely for a first time prop. I used some thermal plastics to make the pommel and the hand guards.     The EL wire is in. (I forgot to get batteries yesterday. FUK!) But the plastic is on the sword. I need to make some adjustments around the battery pack, cover the grip and attach the pommel. I need to make some stuff out of craft foam then I can seal and paint. I hope to get it done in time for the convention but I'm not holding my breath. The logistics of bringing a weapon is a bit beyond what I can handle right now, so I'll use it for the photoshoot I'm planning. Or the next con I decide to go to. :)  On Sunday I did a makeup, wig and costum

Prince Lotor - Day 18 + 19

Image
It's getting close. I can feel it. After several roadblocks this week, the costume is finally in a wearable state. So I'll be doing a test this weekend for any last minute stuff. Now here's what I worked on last time: Belt:  I redid the belt. After seeing how uncomfortably it sat on the dress form and what I needed it to do, I opted to change it. So I took it apart and used the pieces to trace out the buckles in craft foam and the sides in black spandex. The nice thing about this is that using spandex meant I had now TWO side-saddle bags basically making them ultimate pockets/fanny packs. Amazing. I wrapped the buckles in black worbla and smothered the front buckle in velcro. Sword: So I also started the base work for the sword. I had most of the pieces already cut out.  First I shortened my PVC pipe with a hack saw. I dremeled a groove in one of the blades and put in two plastic straws before contact cementing the two sides together.  I also cut one

Prince Lotor - Day 17 Wigging Out

Image
This weekend was hair and makeup. Although, I didn't go to the Salon. I wish I did. I could use a facial. UGH. Anyway, I finally took the wig out and admired it's splendor. At this point I just slicked back some of the hair and put in some craft foam markers for the widows peak and sideburns. I just love how nice the curls look. 😍 But it needs more widow's peak or some changes in the hairline. Which means I needed to ventilate. I don't have a ventilating hook but I learned how to do it with a normal sewing needle. It's probably a bit easier.  But before starting ANYTHING, I installed an elastic band so I wouldn't need to use a bunch of glue or tap to keep the wig on. A trick I learned from some videos. With the band in place it really uses friction to keep the forhead lace flat against your head. I still may need to use some tape for the sideburns though. I need to find my hem tap. :P Anyway, here's what the ventilating looked like after 4 hours o

Prince Lotor - Day 16.5

Image
Just a minor update. I painted the latex ears today. But I thought I'd just do a brief piece on this because the information about how to get latex elf ears to match an unnatural skin tone were not in a convenient place. So, here's what I gleaned from my research and what I did. 1) You can mix your acrylic paints with liquid latex and apply it to the ear. 2) You can also apply acrylic paints directly to the ear. 3) Water-based cake makeup like Krylon Aquacolor or Mehron Paradise are safe to use. 4) Rubber Mask Grease (RMG) makeup is safe to use on latex ears. 5) You can cover the latex in Linseed Oil before applying paints The big take away was you do not want to use mineral based makeup on them since it degrades the latex. But as you can see there are a lot of options. the method I used was simply taking a wedge sponge and coloring the ears with the makeup intended for my skin. 1) I wash and dry the ears since they've been in the bag for a couple years. Cl

Prince Lotor - Day 15 + 16

Image
So, we painted this past weekend. All the parts that needed paint got a coat or two or three or thirteen. XD The limb armor simply got a couple coats of primer + Paint. See here: The chest armor and gauntlets got a bit different treatment. I used Hexflex paint and brushed on over all my rough, awful sanding. Each got at least 2 - 3 coats. I went over everything with the black primer + Paint, but it really wasn't necessary. Here's what they looked like: Then, I made some stencils for the chest piece and some masking tape (which did NOT peel off a layer of sealant this time. Yay.) Simply had some craft acrylics in blue, orange and silver and painted the blue star, blue collar line, silver eyes and orange nose. Kitty armor. Final result...LOL. I also had to readjust the seams after painting. I removed 2 clips and replaced them with velcro straps. But I love how this came out. I also installed the LED kits into the gaunlets and created diffusers out of Worbla Cr

Prince Lotor - Day 13 + 14.5

Image
Over the weekend was quite the poisonous undertaking. It was also breezy outside which kind of sucked. But I covered almost all the armor pieces in Plasti-Dip. However, there were some issues with bubbling and in some cases peeling. :P I did not do even coats despite using the trigger spray. The wind was really distracting. Anyway, got it done on Saturday. My kingdom of trash! OMG. Sunday after Mass and chatting with my parents, I started painting some of my pieces with the primer+paint in grey and black. These came out fine, except for the breeze sort of messing things up. :P Shins Thighs and knee These might get another coat of spray paint, but after some reading on how to make edges look a bit smoother after a rough sanding. I learned about flexible paint. I order some Sunday and got it yesterday and gave it a try.  It's brushed on.  It did seem to fill in some of the tiny holes and bubbles. It'll take a few layers but Hexpaint did make some of the rou