DA2 Warden Day 1: Patterns
So it begins. I have finally gathered enough supplies to get things started. I will post a vlog about things once I get my camera (which should be any day now). But the armor piece patterns have (mostly) been made. The helmet is giving me some difficulty.
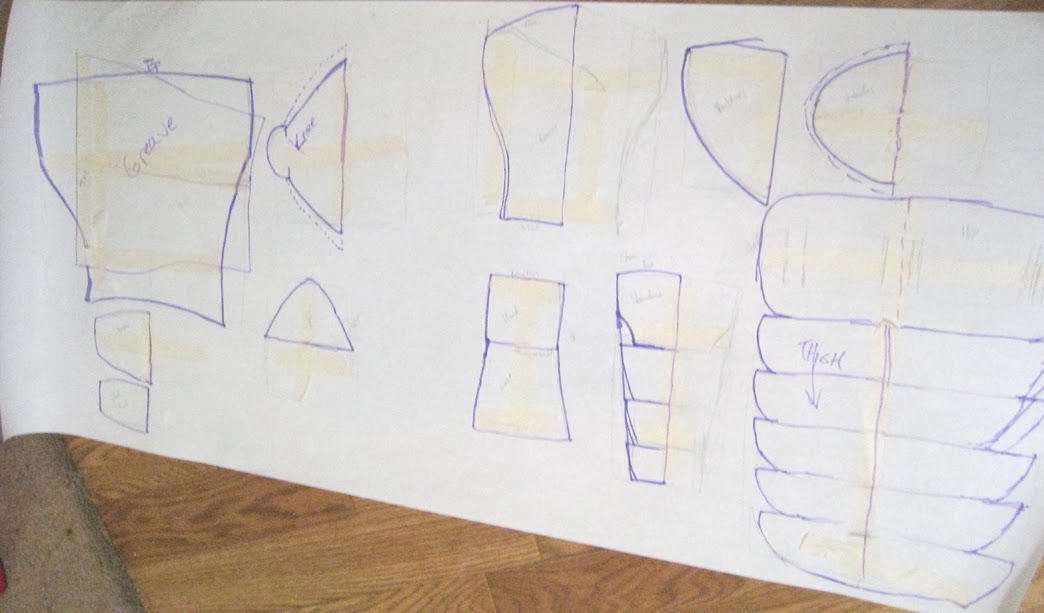
Here is an image of most of my pattern pieces. (I forgot the collar and breast plate. But I shall post them soon!


Here's how I went about making the patterns.
1. Measurements. For me I used a rather estimated method of measuring for the various pieces. First, I opened up my reference images and found the piece I wanted to measure, for example the breastplate. Using masking tape, I taped over my clothes the width and height of the armor piece based on the image and relative to my body.
Alternatively, I could have used measuring tape and wrote these things down, but there's a reason I wanted to try the tape.
2. I peel off the tape in one piece and lay it down on my pattern paper. Alternatively I could have used my measurements and a straight edge.
3. Using the tape dimensions as my guide, I make a bounding box. This gives me the highest and widest points of the pattern.
4. Because the piece is symmetrical, I fold my bounding box in half. Using a pencil I sketch out the basic shape for the breast plate. Since it is in two pieces, I measured for both. When I'm happy with the sketch, I reinforce my line with a marker.
5. With the pattern still folded, I cut out my pattern piece.
6. I hold it up against myself to see if is indeed to my liking. If the pattern is too big, I can trim it down easily. If it's too small, I can add to it.
That is how I generally went about making my armor pieces. Here's a video demo.
I prefer to cut with an exacto knife or blade to a pair of scissors. I feel it has more control. However, paper cutting does dull the blade quickly.
Label important parts! Which part is the top and bottom. Which body part it is supposed to attach to and suc.
Cater your pattern to your material. Since I'm useing craft foam which is flexible and can be molded with heat, I did not feel the need to "compensate" for material stiffness. If you are using a stiffer material like cardboard or cardstock, the patterns I have provided may not be the best. I would recommend using Pepakura patterns for stiffer materials.
Here is an image of most of my pattern pieces. (I forgot the collar and breast plate. But I shall post them soon!
Here's how I went about making the patterns.
1. Measurements. For me I used a rather estimated method of measuring for the various pieces. First, I opened up my reference images and found the piece I wanted to measure, for example the breastplate. Using masking tape, I taped over my clothes the width and height of the armor piece based on the image and relative to my body.
Alternatively, I could have used measuring tape and wrote these things down, but there's a reason I wanted to try the tape.
2. I peel off the tape in one piece and lay it down on my pattern paper. Alternatively I could have used my measurements and a straight edge.
3. Using the tape dimensions as my guide, I make a bounding box. This gives me the highest and widest points of the pattern.
4. Because the piece is symmetrical, I fold my bounding box in half. Using a pencil I sketch out the basic shape for the breast plate. Since it is in two pieces, I measured for both. When I'm happy with the sketch, I reinforce my line with a marker.
5. With the pattern still folded, I cut out my pattern piece.
6. I hold it up against myself to see if is indeed to my liking. If the pattern is too big, I can trim it down easily. If it's too small, I can add to it.
That is how I generally went about making my armor pieces. Here's a video demo.
General tips
For armor, it's okay to go a little bigger than necessary. It's easier to trim a piece down than to add to it.I prefer to cut with an exacto knife or blade to a pair of scissors. I feel it has more control. However, paper cutting does dull the blade quickly.
Label important parts! Which part is the top and bottom. Which body part it is supposed to attach to and suc.
Cater your pattern to your material. Since I'm useing craft foam which is flexible and can be molded with heat, I did not feel the need to "compensate" for material stiffness. If you are using a stiffer material like cardboard or cardstock, the patterns I have provided may not be the best. I would recommend using Pepakura patterns for stiffer materials.

Comments
Post a Comment